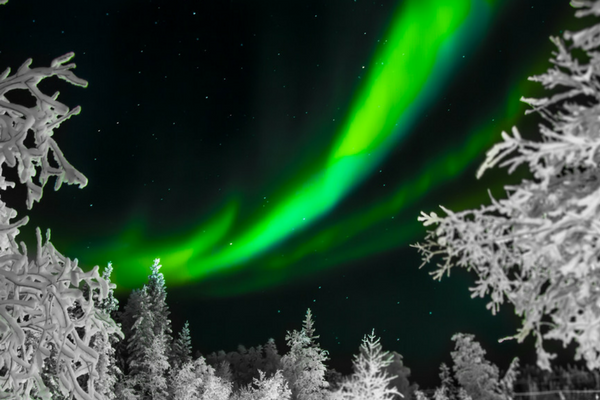
That moment when you see the Northern Lights in the Arctic for the first time is one you never forget. The swirling, dancing, racing colours paint the night sky in reds, blues, yellows, and greens – a phenomenal show courtesy of Mother Nature herself. The chance to see this spectacle is almost never guaranteed, but if you’re lucky enough to spend an evening gazing at the Northern Lights, you’ll want to capture the moment. You’ve probably seen some of the amazing photographs that are possible (like the ones in this article), but taking photos of the Northern Lights is an art – not a point-and-shoot exercise. We’ve put together five tips for photographing the Northern Lights that should get you one step closer to capturing the magic on film.
Bring A Tripod
We know, tripods are not known for being light and easy to carry around – but this is one tool you can’t skip if you plan to photograph the Northern Lights. You’ll need a tripod that is sturdy and robust, and that can handle high winds or other weather conditions you may experience in the Arctic. As you’ll need to keep your camera perfectly still, while taking long exposures, the tripod will be your secret weapon.
Get To Know Your Camera Settings
Purchasing a brand new camera before your trip and expecting to take Instagram-worthy photographs of the Northern Lights is a rookie mistake. Before you set off on a Northern Lights voyage, understand your camera’s capabilities – particularly your lens settings. Most experts recommend a lens with a fast aperture of around f1.4 or f2.8 and ISO settings at between ISO 400 and ISO 1000. You’ll need a long exposure to capture the subtle colours of the sky, so a camera that is too light-sensitive will never do the show justice.
Find Some Perspective
When you are standing under a giant sky of dancing lights, perspective is easy. In a photograph, this can easily be lost and the once impressive nature of the experience is suddenly flat. Try to find an object or landmark to use within your photos to give the viewer a better perspective. This could be a shadowy mountain, tree, or even you. Using an object which is emitting light itself (for example, a tent glowing from a torch that has been turned on inside) can create an especially dramatic effect.
Remember Your Surroundings
You’ll probably be joining your Northern Lights tour from the comfort of a heated ship or hotel. Outside the temperatures will be freezing and your cameras and batteries won’t do well adjusting to the sudden extreme conditions. Keep extra batteries somewhere warm (a backpack or jacket pocket) as the cold will drain them quickly and render them useless. Your camera should be exposed to the colder air ahead of set-up. If you attempt to photograph the Northern Lights with a camera that has just been exposed to the cold, you’ll likely end up with condensation which will negatively affect your final photos.
Enjoy The Moment
We live in a share-as-you-go world, and it’s not unusual to share photos, videos, and even live streams on social media at the very second we are experiencing something. This can be great for your friends and family, but it can also keep you from fully enjoying a special moment. By all means, take some beautiful pictures of the Northern Lights – but remember to take some time to create beautiful memories as well.
Ready to start planning your incredible Northern Lights cruise?
Simply complete our enquiry form to get in touch, or call our Polar Specialists on 020 3820 0516.


Share It:


.gif)
Leave a Reply